
Maybe it's just that I'm a woman,or maybe I'm too much of a cheapskate, but I changed my mind and couldn't make up my mind about this floor so. many. times.
Just for reference, this project started with ordering materials back in early October and we finally got the floors in somewhere around late January/Early February.

Let's start at the very beginning,
(a very good place to start...
Whoops, I'm getting off track, I'm about to start singing.)
Ok, floors. So, first of all: keeping what we had was not an option. It was gross and nasty and had to go. But we were smart about it. We did ALL of the painting and staining throughout the house before we replaced any of the flooring so as not to mess up our brand new floors.
While we were doing all the painting around the house, I thought about, designed, researched and ordered materials for the kitchen floors. When I was planning and designing something inside me knew that red and light blue was a super retro combination for a kitchen. I knew we were updating a lot of things and keeping the color scheme retro I hoped would make the updates fit in with the older feel of the house.
Below are pictures of what our cars looked like when we picked up the order. Saggy. Those boxes were SO VERY heavy.


as a side note, I also ordered materials for the backsplash. I LOVE hexagons and penny tile, they are so cute and vintage and just adorable. However, as cute as I thought they were I didn't think the blue went well with the blue on the walls and I thought the hexagons looked a little cluttered with the floors I was considering. Maybe knowing what I know now, I would have used the hexagons with white grout, but what we went with was MUCH cheaper.


So because we had to paint and clean and repair so much when we first moved in and we had to replace some things, we were spending money left and right. More than I ever thought, so I tried to find the best price on durable but cheap materials. This led me to VCT tile. That's the stuff you see in Hospitals and Schools.

They are 12x12 vinyl tiles that come in lots of colors. At about 68 cents a tile, I figured they would work.


I ordered 7 different colors of grey because there were no samples in any store. I ordered all the grays I thought might work so that I could see the actual colors in our kitchen. These 5 made it to round 2. I also ordered a box of red to use as an accent tile. I compared them all to see which two grays I would use with the red. When we stained the cabinets and got the countertops it made the choices a little easier because we had other greys to compare it to.


I drew up some pattern plans. These involved cutting and slicing the tiles with a tile cutter.
It would be very involved, but I figured it would be worth it in the end.
You may want to get up and stretch at this time.
I know this is a long one, but really I'm just getting started.
After we stripped, stained and sealed the cabinets we started peeling off the floor. Well, sounds easy, but it was so much more than just removing the old sheet vinyl. We had to remove three layers of sheet vinyl and three layers of glue and replace parts of the floor that were water damaged and rotting.
Yikes.


So we (we: Jeff with help from Daniel, while I cleaned something or painted something) had to replace the sub floor under the dishwasher and under the refrigerator. The basic process of that was to pull up/cut up the vinyl over layer so that we could see exactly where to cut. Some of this was visible from the basement below and some of it could be felt when it was walked on and most of it was visible to Jeff's trained eye because of warps and dips in the vinyl.


So after that was in Daniel scraped up the rest of the floor. Which took. FOR.EV.ER.
You can probably tell from the pictures, but it came up in very small pieces. The top layer came up fairly easily. The bottom two layers had a very strong glue between them and they were brittle from age. It was painstaking.

Then under the (sort of cute) faux pebble layer on the bottom was a blue/grey felt-like backer. (Pictured above along with the under dishwasher patch) Dun.Dun.DUN. Yeah, we think it was probably Asbestos. Ew. Daniel and our friend Lena and Daniel's brother Seth, used hot water soaked towels to get it up so they wouldn't inhale any more particles than they had already disturbed. They got most of it up this way and we decided to leave the tough patches, it wouldn't hurt right? **This is not a researched or proven method, it just seemed right for us at the time**


So then to level out the floor and prepare it for tile. I did some research and found that there was a self-leveling compound(float) that could be bought at the Home Depot. Sweet. We can spread stuff on a floor. When Seth was here, he did it for us. It was great!! It looked great, it took more "float" and time than we thought, but it looked great. So we left it to dry.
When we came home to find it dry, we walked across it and it cracked!!!! NOOOOO! It was the Asbestos felt that was loosened by the wet float. (Mr. PotatoHead needed his angry eyes) So, we (again, we is Seth and Daniel) scraped that part up and got up all the felt, then poured more float. UGH. but now it was really done. And it looked great. :)
So we talked and we debated and we talked some more. We asked friends and family who knew about replacing floors and we decided that we should go with real tile because: it's grouted, so it's more forgiving of the cuts, it's classier, it will sell better when we decide to sell and it's not too many more dollars.
So out we go again to shop for tile. We went to Floor and Decor and Home Depot and all the other Home Depots in the area. To make this brief, I am going to just show you all the pictures I took of the options we considered.


(that last one is at the Fox, I wish I could have found something like it that wasn't $$$)
So we ended up with the three options below. I posted these pictures to FB and let the people vote. Also, my parents and Daniel's mom and Seth and Lena and Jeff all let us know their thoughts.


We ended up with the narrow white one (far left in the first pic). It had a matte texture to it, unlike some of the others and stood out from the cabinets. I feel like the white makes the kitchen look fresh and clean, even when it's not. :)

Because it's on the floor I wanted to go with a really dark gray grout. It coordinated with the countertops. This way if it stained you wouldn't be able to tell. My mom said it would look dirty all the time, but we did it anyway. And you know what, it looks great and Mom thinks so too!!
Win-Win!!

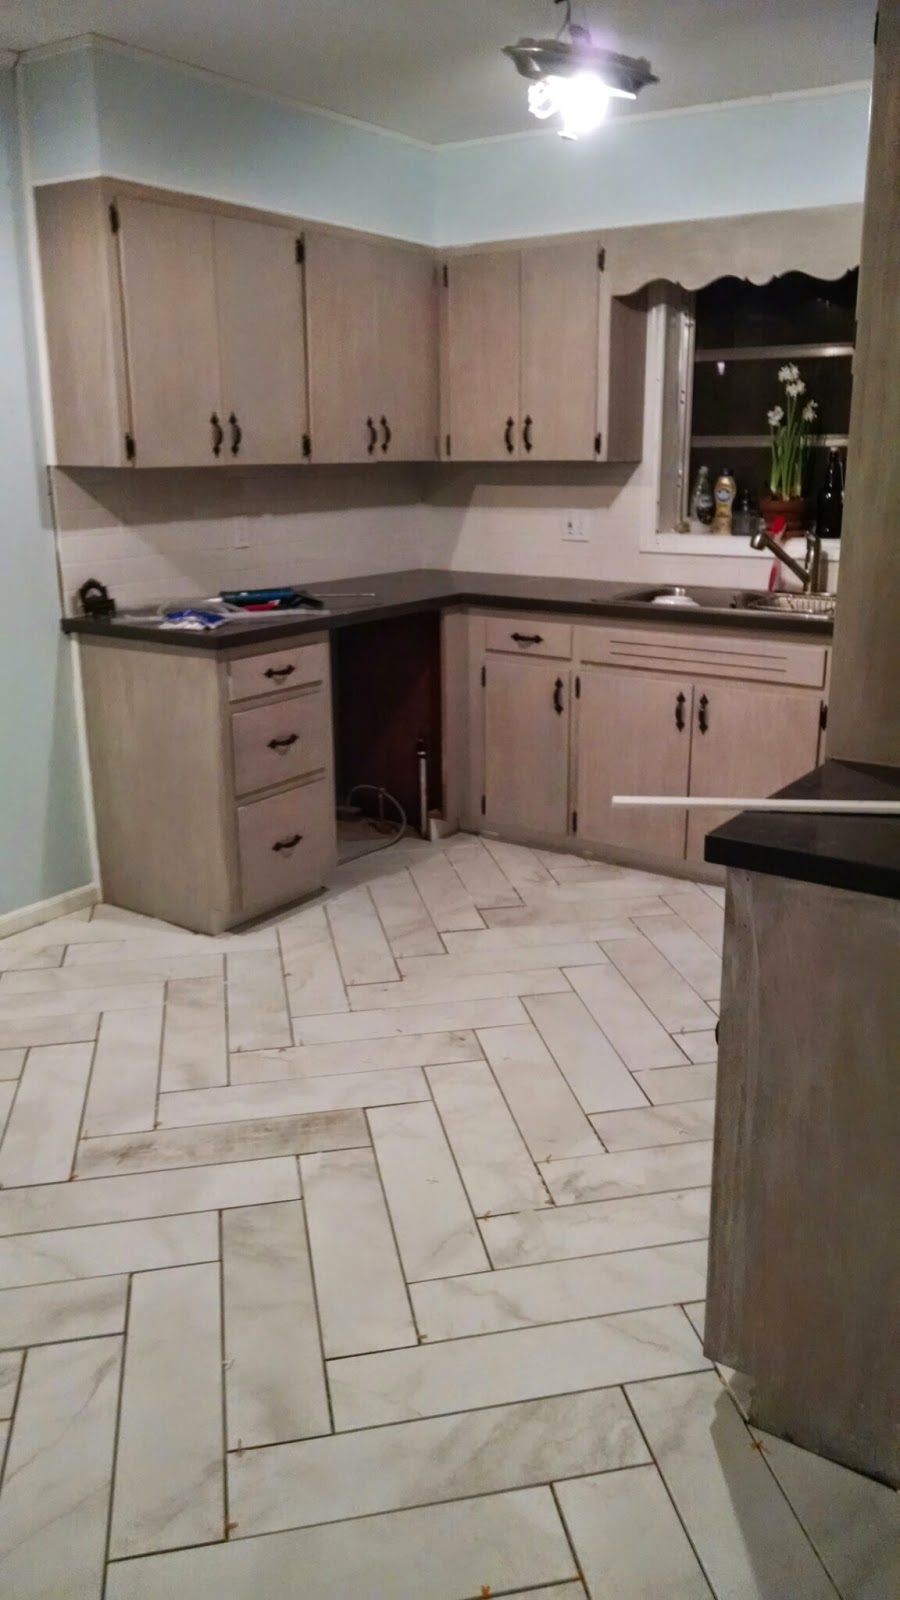
(The marbling in the tile makes it look less dirty too. )
If you read all of that you deserve a cookie. Thanks!
Please let me know what you think, have you done a project like this? Do you have any tips for next time?

Love,
Sarah


