Well this project is all but done, but I am so excited about it, I felt like I had to share!
I really disliked this bathroom from the start. It used to look like this:
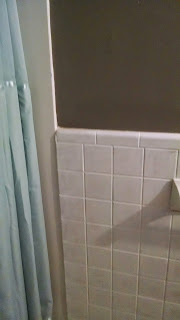
Peachy-Tan is not a pretty color. This is the color my skin turns when I burn and then it turns into a tan. It's just pink enough for me to not be a huge fan. In February I up and painted the walls grayish brown.
A definite improvement, but not wonderful. So I did some research, and despite everything my mother and others said about painting tile, you can. So I went to Home Depot and bought some primer that is specifically designed to adhere to extra smooth surfaces. It's called 1, 2, 3 primer. It worked really well!
Above is my friend Emily helping me paint the tile. On the right is after the one coat of primer. You might be able to see that it's covered, but you can still see some peachy-tan is peeking through. Which is really perfect, because I still had an enamel layer to paint on.
While we were painting I pulled off this horrid stuff. It's vinyl shoe-molding. It was probably nice when they put it up, but it's very yellowed and dirty. The issue with this being up is that they glued and caulked it on. So the glue and caulk were partially left on when I pulled all this off.
You can sort of see where I didn't paint all the way to the bottom. I also opted to try painting the tiled in hardware (tp holder and towel bar). I worked wonderfully. While it's drying this paint levels itself out, which is wonderful! It dries very glossy and beautiful. It looks just like enamel tiles with white grout. There is ONE single spot (that I've noticed) that has some little drips. :( but everywhere else it looks great. Jeff even told us he forgot that it was pink before. Win.
We used this groutable tile and white grout. After reading reviews and seeing pictures from the website about this Traffic Master vinyl tile we decided to grout it, so it would look more like actual tile. We also used the piping method. It was really hard at first, not sure if the grout was a little too dry or the bag not right or it was just lack of experience, but I eventually let Daniel do all the grouting.
I didn't let him have all the "fun" jobs though. I marked the tiles for cutting. Which was pretty cool actually. I used some math skills that I thought would never get used. Hooray! It's not perfect, but it will work. The hardest cuts were around the toilet and in the doorway. Daniel did the actual cutting with a exacto knife and a heat gun. when heated this tile cuts like butter.
Whole floor and a closeup. (for reference, the tiles are 2 square feet) It's an oddly small, yet spacious bathroom. It was remodeled (the only one in the house to be before we moved in) to be used by the handicapped.
This is what the top of the walls looked like before we added the crown molding. The blue tape marks where the studs are. You can't see it in this picture, but some places in the ceiling really need sanding down and retaping over seams, but we didn't want to tackle that so as best we could we covered it up with Large crown molding.
I thought I had a picture of it with the molding but I don't, so I'll update it really soon with the picture. So make sure you check back!!
Love,
Sarah


